


Showing posts with label jewelry findings. Show all posts
Showing posts with label jewelry findings. Show all posts
Tuesday, February 2, 2010
How to Make a Covered Button & a ponytail holder (Video)
I finally made a video of how to make a cover button ..... ahhh! Also, I will show you how to make a ponytail holder with the covered button! Here you go:

Tuesday, January 19, 2010
A Beautiful Acrylic Dahlia Adjustable Ring
 I recently bought some beautiful acrylic dahlia cabochons from www.waytobead.etsy.com for my cabochon rings. I bought a bag of 8 dahlia cabochons with 4 different colors - fuchsia, orange, lime green and baby blue. I attached one of them to my 10mm pad adjustable ring blank with an E6000. It dried up in minutes, fantasic! Please stop by my shops at www.CutieStuffs.etsy.com or www.CutieStuffs.artfire.com for these ring blanks!

Saturday, August 29, 2009
How to make Ear Wire Earrings?
Do you want to make your own designed earrings? Don't think that it's difficult and let it stop your creativity. Here is a tuturial demonstration of making ear wires (French hook earrings). It's easy and so much fun!
 First of all, you need the tools (round nose pliers, a side cutter & needle-nose pliers-sorry, the needle nose pliers is not showed in this picture), beads (I have 5mm, 3mm & glass beads) and earring findings (2 head pins, 2 eye pins & 2 French hooks) . In this demonstration, I will make earrings with 2 sections each. This picture shows the layout and order of the design.
 We'll work on the bottom section first. Arrange beads onto the head pin following the design of the above picture. Then use a pair of needle-nose pliers (here you go!) to bend it over to make a 90 degree angle.
 Then cut off excess head pin with the side cutter. Leave approximately 1/4 inch.
 Grab the end of the head pin with a pair of round nose pliers and make a loop. But don't close the loop yet because we need to put the eye pin into it to make the top section of the earring.
 Now, put the eye pin into the loop. Then use the round nose pliers to make a closed loop.
 Again, arrange the beads onto the eye pin following the designed on the first picture.
 Then cut off the excess eye pin leaving approximately 1/4 inch. Use the round-nose pliers to make a loop. Before you close the loop, remember to put the french hook into the loop.
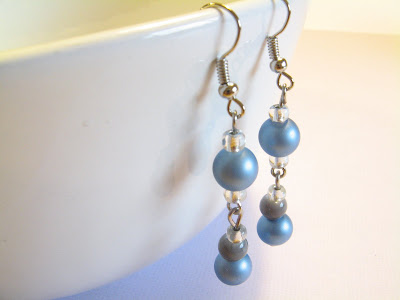
 A beautiful ear wire is finished. Follow the above instruction to make the second piece.


 First of all, you need the tools (round nose pliers, a side cutter & needle-nose pliers-sorry, the needle nose pliers is not showed in this picture), beads (I have 5mm, 3mm & glass beads) and earring findings (2 head pins, 2 eye pins & 2 French hooks) . In this demonstration, I will make earrings with 2 sections each. This picture shows the layout and order of the design.
Check out my shop for fench hook earring findings.
 We'll work on the bottom section first. Arrange beads onto the head pin following the design of the above picture. Then use a pair of needle-nose pliers (here you go!) to bend it over to make a 90 degree angle.
 Then cut off excess head pin with the side cutter. Leave approximately 1/4 inch.
 Grab the end of the head pin with a pair of round nose pliers and make a loop. But don't close the loop yet because we need to put the eye pin into it to make the top section of the earring.
 Now, put the eye pin into the loop. Then use the round nose pliers to make a closed loop.
 Again, arrange the beads onto the eye pin following the designed on the first picture.
 Then cut off the excess eye pin leaving approximately 1/4 inch. Use the round-nose pliers to make a loop. Before you close the loop, remember to put the french hook into the loop.
 A beautiful ear wire is finished. Follow the above instruction to make the second piece.
Need french hooks? Check ou my stores here!


Wednesday, August 19, 2009


Sunday, August 16, 2009
Tuesday, July 7, 2009
How to make a fabric covered button ring?
Wow! It's summer! I just came back from Orlando, FL with my family last week! The vacation was great and relaxing, but he weather was extremely hot! I couldn't bear it! Is it time to do some beautiful crafts this summer? how about making a fabric covered button ring? It's easy to do! Scroll down and watch the video...


Subscribe to:
Posts (Atom)